Showing posts with label guide. Show all posts

Friday, May 16, 2025

PCSX2 setup on PC

 Its possible to setup PCSX2

Have your game ROM ready to roll.

1. Go to official PCSX2 download installer.

2. Dump BIOS into the bios folder. Find a reliable BIOS file.

3. Set where your ROM file path is.

4. check your controller mapping/setting or use keyboard default.  Launch ROM.


Viola here we go. Relive your younger gaming years. Cheers.


Here is how BIOs file should look like. google up for a reliable source of it.


Friday, January 5, 2024

Poutine - the canadian snack


Clearing stock, here is another recipe thats easy fast and delicious. Only few ingredients. Apparently poutine is like a national dish in Canada. Here is what google yields of its origin:

Poutine, a Canadian dish made of french fries topped with cheese curds and gravy. It first appeared in 1950s rural Québec snack bars and was widely popularized across Canada and beyond in the 1990s. Poutine may be found everywhere from fine dining menus at top restaurants to fast-food chains.


Ingredients: 

-either potato to slice and make fried, or frozen fries

- curd  , replaced with cheese i have on hand.

- gravy i had from previous roast of chicken, thicken and add soy sauce some flour to thicken. this one could have been more diluted to reduce saltiness.

- variation  - added some slice of sausage and half of diced yellow onion. (loved the onion additional flavor).

Bake or Fry potato which ever way to cook it up. I used oven, just dump frozen fries inside preheating oven for 10-15 mins while i get busy on other things. Set 175 C for the fries 18min add sausage slilces . At 5 min left, drop in yellow onion into the oven to bake as well slightly. Gravy leftover just drop the teared chesse slice into gravy and nuke it in the microwave for some hot sauce and melted cheese goodiness. Drizzle on top of fries, sausage and onion mix and serve hot.

Sidenote: being asian, not a simple drip of gravy goes to waste. I nuked gravy together with one slice of white bread from my freezer. Tools to clean up gravy :)


Monday, December 18, 2023

Braised pork belly

This is part 2 of my remaining half of pork belly. It goes to the original braised pork belly or black soy pork (oh tau yew bak) plan. My intention is to make it really soft by braising , trying to achieve the taiwanese ru rou style aka melt in mouth.

INGREDIENTS  

For the saute on pan cooking part:

1 slab pork belly About 2 pounds -  using what's left from roasting

2 tablespoons soy sauce  - reuse the soy liquid from mayak egg marinate lots of them to create liquid

5 slices fresh ginger powder , dash of it about 1.5 tablesppon

3 stalks green onion Cut into 1 inch pieces replace with diced white onion, red onion, garlic, half tomato i got lying around and mixed meat powder

4 tablespoons chinese cooking wine You can use your favourite white wine instead - swapped to my cheap 2L Belo Vino 

2 pieces star anise Broken up - skip since i dont have

1/2 teaspoon ground cinnamon Optional -add a dash of it


For the dark soy sauce part, heat separately in pot.

2 tablespoons dark soy sauce

2 tablespoons brown sugar - used sugar

INSTRUCTIONS


Cut the pork belly up into 2 centimetre thick chunks.  This is the traditional Chinese way of serving it.  Place meat directly on pan to fry no need oil lots of it will be extracted from the meat. After browning the meat in a separate pan saute the onion, fragrances along with the other seasoning ingredients and  the soy sauce mix cook for 15 minutes.

Add the browned meats, to saute pan and finally transfer to the pot with dark soy sauce and the brown sugar. Bring to a boil and then turn it down to a slow simmer. Cook until the liquid condenses into a thick gravy i just leave it up to 2 hours. It turned out similar like those ru rou pot broken down meat.

That's it, ready to serve! Result is pretty satisfying even though lacking the rare 5 spice powder in burek/balkan land.

Thursday, November 30, 2023

Yangpa Jjangajji -pickled onion and chilli


Saw on insta an easy no cook version by eboake. taste great due to soy + sugar duh. i soak 1 day and removed onion, continue use to soak as mayak egg liquid.

Chopped onion

Chopped chilli

1/2cup soy sauce

1/2 cup sugar

1 cup vinegar

1 cup water

Add minced garlic variation.

Tuesday, November 21, 2023

China visa application (for those who need it anyway)at Belgrade

source from google maps - opening times updated to Mon,Wed, Thurs per embassy' email feedback

Pretty strange circumstances I have. Since family plan trip to China I need to submit my own here. Local citizen don't need visa for tourist entry so I'm like the odd person applying china visa at Belgrade.

Some basic embassy link for info :http://rs.china-embassy.gov.cn/eng/lsyw/qz/

Anyway, first follow the online link. Key in all the information have a visa photo softcopy ready. Don't need actual since the form will attach by the website into a visa form. So save money printing the photo. The checklist is there , just follow 1-9, fulfill then provide i suppose.

source via embassy site

Need passport copy , one blank page for visa stamp, residency status in my case I had temporary residence pass, precious approved visa records. China itinerary , flight ticket and accomodation booking info . I attach too work contract and travel insurance since I got them for my work trip seems to work.

Visa issue is 3 months validity , so need to time that it's valid for my trip. Once everything is in place submit online. Asked in email to embassy no need appointment just walk-in to submit. Location is at Konzulat kineski at Augusta Cesarca 2b opposite is a small cafe.

Wait for turn, go to middle counter and give all documents , sign the application form and handover passport . The visa should be ready in 1 week or so i was told. It was Monday on the day i went and the NPC lady said to collect next Monday. Had to remind her how about payment.

Payment is to be done at Raiffeisen bank. Embassy will produce a slip it costs $40 for single entry L visa for tourist. Probably covert up to 44xx Dinar.

Only hiccup is I went to bank, queued for 30 mins and the lady said need to see a copy of the passport..whatthefack. So had to go back there again next day with a softcopy and printed photo of passport or whatnot. What a bummer.

Finally on next day morning, went back to bank for round 2. Queue 30-40mins again, this time finally managed to make payment. Got my receipt and my slip back. Looks like exchange rate changed, so total damage is 4507 RSD.


Thursday, November 16, 2023

Oven Roast chicken - easy , juicy

 Whole chicken. Remove the innards from the ribcage area. clean the rub with salt/seasoning

Marinate - with salt, yellow tumeric for few hours.

Do quick google about oven roasting 1kg take 1 hours. more or less at 200c. split 30min , then turn the chick. i changed to the steel tray since sitting on plate will soak the chicken. Plate below the tray to collect chicken sauce , add herbs + onions, potatoes and carrot. 

Glaze material . Easy to find ingredients you have in your fridge or pantry.

Garlic + Butter = Garlic Butter

A touch of lemon

A hint of dry white wine (optional, but adds so much flavour to the meat while keeping it so juicy)

Orange juice

1.5 tb of sugar

Sprinkle of salt

A bit of soy sauce

Mix herb + seasoning for meat


First time i do roast chicken in oven in my life. Juicy and nice, could get crispier skin if roast another 10min i think. Cheap and pretty easy.

Washing to be done later after roasting. Using ikea plate is possible.

This yields 2x wings, 2x drumsticks, 2x chicken breast meat and bones for broth making later.


Friday, October 20, 2023

Apple pie filling recipe - trial and error


Looking at cheapest material where i am now. -apples 

First time in life, im gonna try my hand at making sort of jam/ spread using apple pie filling recipe.


Ingredients - 

4-5 apples i think i cored and peeled up to 6 of them  (bought cheapest Gala, smaller and fresh).

Dice them and put aside.

On medium heat pan drop in .

2 tbspoon - butter  ( i used margarine aka fatty spread here).

2 tbspoon water - substituted with apple juice since i got on hand

1 tbspoon cinnamon powder - bought 1 small pack just for this experiement.

1 tbspoon sugar - sub'd with 1 pack litttle brown sugar

Add diced apples. 

Keep cooking until they turn soft. Dont have a masher, i kind of wanted something like McD's apple pie filling. So i cut them smaller while cooking until they soften and water. 

Add cornstarch 1tbspoon  - i use feeling measurement.

Cook until apples soften to your liking.

Let cool off, then keep in jar - i suppose refrigerate. Will update back how long it lasts.

This recipe yields me like 3/4 of a big jar. Labor intense, cut and dice apples while watching swordsmitch arc kimetsu no yaiba. But taste is pretty good, like those from mart shelf, minus all the preservative im guessing it depends alot on apple sweetness level, or to compensate by adding sugar.

The skins from peeling, throw them into oven. i baked 10 min 100c 2 times, then go for 15min 125c. Abit charred, but its crispy. Maybe last round should've gone 10min 100c as well. Make use of everything, these ideas i get after looking around random insta post.


Wednesday, October 11, 2023

Raita - timun/zuchinni yogurt mix


This indian salad is pretty straight forward. Makes a great low calory snack or when you feel like need something to bite.

Core materials that makes the taste matter: 

Zuchinni  1pc

Indian onion 1pc

Red Paprika (quarter)

Apple (quarter or half if you like sweet)

Diced tomato - (quarter)

Jogurt 2.8% - pour in as needed use jour brajn

Lemon  (quarter)

Chop slice and dice zuchinni into small size. Salt and let sit 10 minutes. Continue dicing up the rest of items. Squeeze zuchinni to discard water and mix all together. 

 Add a dash of salt and sugar. 

Squeeze lemon juice. mix , mix and ready to serve.


Optional - add chilli powder (don't make much difference to me). 

Optional - add parsley flake or cumin powder or mint flake (don't have these so no idea what's the difference).


I serve with some fried onion since i like crunchiness. tomato may contribute to watery gravy ,may opt to leave it out if you like less watery yogurt sauce. 


Thursday, August 31, 2023

Surivor note: DIY Quick Kimchi - derivation from kimchi pack base

So to be lazy and not cook that much that often i found the Chinese Market selling kimchi in little packs. Psst, this probably finish in 1-2 serving. Then i got an idea, why not use this as base and make my homemade kimchi batch. 


 Recipe: 

 Zuchini/Krastavac 1pc 
Cabbage (no napa cabbage here) less than half of small ones. 
Paprika/green chilli  - half pc
Yellow/Holland Onion/Luk Crni 1pc 
Garlic/Luk beli 7-9 cloves 
 Red apple/Jabuka - half sliced and diced. 
Carrot 1pc small sized 
Salt 2 tablspoon 
Sugar 3-4 spoon or to taste 
Vinegar/used old vinegar 1 spoon 
Red chilli powder since no gochugaru - 3-4 spoon to taste 
Lemon 1/4 or 1/3 , use your feeling. 
White sesame 
A drizzle of honey - optional 

1. Zuchini, slice into small bitesize piece, sprinkle salt. Set aside for water to discard. 
2. Cabbage, chopped into size u like, i like smaller fine slice. 
3. Boil water with salt. This is brine - once boiled let it rest 5 min. Dump cabbage in for 10 min. 
4. Add water to the pot, soak for 5 min . Drain and sprinkle salt over cabbage, let rest 15-30 min for salt to soak in. 
5. Rinse cabbage, drain, let it dry. 
6. Chop up the rest of veggies into smalle pieces. 
7. Mix salt sugar vinegar chilli powder to cabbage, add in the little kimchi packet for the base. 
8. Mix all together, test and add what is lacking to taste. 
9. Let it rest in room temp for one night. (up to here, will check back if this round 2 ferments great) 
10. keep in fridge for up to 2-3 weeks.


Wednesday, February 9, 2022

Crypto 101 readings -

 This one got me reading on and on.. 

Cryptocurrency , block chain, DeFi . so much to read, and so less time .. so much shit to clean at work 💔

https://ringgitohringgit.com/investing/cryptocurrency-malaysia/

(credit to author Suraya)

  • Bitcoin (BTC) – the OG crypto. The one you heard about the most, and the one that started it all
  • Ethereum (ETH) – ‘Programmable money’. People interested in DeFi – Decentralised Finance – should check out this one.
  • Litecoin (LTC) – kinda like budget version of bitcoin (oop I said it). They say that if bitcoin is digital gold, then litecoin is digital silver
  • Ripple (XRP) – Ripple is actually a private and CENTRALISED company, which means crypto purists hate it. Holding XRP is kinda sorta like holding stocks in a remittance service provider
  • Bitcoin Cash (BCH) – A fork of Bitcoin. See Section #9 – Why are there two bitcoins

Tuesday, September 21, 2021

What is the current SOP ? everyday Malaysians lockdown questions/confusions

 It's been almost 2 years of lockdown, on and off work from home. Couple months of school opening and closing back. So with all the changes there is a link that will let us refer to which phase of MCO we are at at our current state and what are the limitations of activities SOPs we should adhere to.

From MCO 1, 2, 3 , EMCO etc... we are now at so called recovery phase. So each state will have it's own phase and SOP allowance.

main page.

https://pelanpemulihannegara.gov.my/index.html


Click for rakyat/business.

https://pelanpemulihannegara.gov.my/selangor/index.html


Friday, May 10, 2019

POS office Malaysia jln gurney

Just noticed my driving license expired this morning. Happen to come by KlCC side office so I either need to go KLCC or Jln gurney. Took the later as it seems near from intermark and probably less crowded. but it's a hot 25 min walk 😧😧

Renewing driving license here is pretty straightforward. Get a number from machine for 'pelbagai' wait for your turn, pass your old license and IC and pay. Collection is on the spot in less than 5 min. 

My wait is about 10min which is generously short compared to past experience at other PO (1-3 hours wait with crowds hogging all the waiting seats).


This is a good place for your PO business. Short queue less visited. Now for my hot walk back to office 

Wednesday, October 18, 2017

Check how many LED lights your room/house need & my thoughts on renovation's choice

Got different feedback from contractor saying that the original developer's layout or placement of wired power point is insufficient. He suggest to for example in bedroom place 4 LED points to have sufficient light...

Maybe this is dependent on taste, requirement for use and what we intend to do with the rooms. E.g. reading, sleeping , relaxing etc......Living room most likely we can treat it as a showroom; have extra LED lights to eliminate shadows and give stronger light ambience.

Then there is also a choice of warm light (yellow, quite dark) , cool white (soft but white) and bright white (strong white light, but not necessarily highly luminescent than cool white) . This is input we get when we visited Puchong's Houses of Lighting , famous shopping place for cheap lightings.

Anyway, back to the topic; a little surf with Mr G reveals there is probably some scientific backings to how much light we need and formulas..hmm interesting if I have time to ponder about it. Not the right time at the moment..as im losing sleep trying to archive all my current thoughts now.

Link for reference here.

I took a sample of our bedroom, 14 ft x 16 ft x 10ft as in width x length x height.
Seems like depending on the design we want, we have quite some option. So not true that a bedroom of this type of size needs at least 4x 18W LED downlights.


We sort of decided against getting a hood. Seems quite useless in 3-5 years time, in addition to it's crusted oil debris on the hood steel linings that can contaminate your cooking over time. There is also maintenance for baffle type filter hood which is about min once in 2 weeks of heavy cooking. The cost of getting a hood seems more like will be put in better use if a) we install a 10' exhaust fan b) after 5 years we repaint the ceiling. Only worry i have is whether the build in cabinets will survive the test over time. That will remain to be answered by then i guess.

For sink, we are looking for at least 0.8 mm thickness type, probably narrow down to Cabana and HCE. One other requirement we need is the basket type filter that comes along with the drain. Undermount type is more thick and expensive apparently.

Tile - remains unexplored. Guocera is probably the brand of choice until we pay a visit to Super Ceramics.

Hob - narrowed down to Rubine, RGH-PEPPER2B-BL. Price wise economical, have safety valve, cast iron , aeshetic value with 6mm tempered black glass. Lowyat post have one guy commented that better get at shop since it will include cap and hose i suppose for hood and no additional delivery charge.
Another surf around the net, cast iron seems like is preferred for its sturdy build, lasting and non stick characteristics. However, its heavy , hard to clean , tend to rust if requirements permitted it and retains heat (well useless since we talking bout stand here, not cookery). One remark i heard is , cast iron is heavier, which helps it stabilize better for pan/pot balancing, not sure if this is true though.

from lazada, any thoughts about this? gimme a holler yo.


So much to do, yet so little time. Feels like racing uphill against current if this laments even make sense at all now..

Friday, September 22, 2017

Minor Reno - DIY Wall mount Fan Installation

Got a broken wall mount fan at my condo unit. Was looking around Old Klang Road and can't seem to find alot of electrical shops instead so many air cond only or car air con shop and tons of foodie shops. OKR ppl loves their air-con eh?

Anyway, I went back to Yat Sin Electrical @ Taman United which is pretty much 5 min away from the condo and they don't do installation service as what they told on my last visit there. So i came prepared with my tools and a ladder.

KDK wall mount fan


Bought the KDK wall mount which is their cheapest, and at one hardware shop brought one block of wire connectors. This type of fan has a power plug like those normal electrical devices used in kitchen, so need to DIY a little, cut off the power plug since my original wall mount is direct wired not via a plug.

Cost:
KDK wall mount fan : RM170
Wire connector block : RM1.50


Wire connector

Let's get started. Unpack, check everything is there.
The wall mount hook is not needed , just reuse existing mount already screwed to wall. Cut off the power plug.


Strip the cables of fan, make sure to switch off house power breaker.
Connect the wires together via the connector block.
Green to green, brown to brown and blue to blue. (brown/blue = neutral/live), can use the same AC power detector pen to test out whether the current supply is running before turning off the breaker.

Before visiting the fan shop, I actually tested that the cables are carrying current to ensure that my power supply lines are fine, and that the old fan unit is damaged.


From fan unit side.

From power supply outlet side.

Once connected, test out the fan unit before assembling the rest of the stuff. Back cover first, the round holder to keep it in place, then fan blades and its black holder. Finally the front cover, fit it in with a snap and secure by closing the plastic latch.


Minor Reno- Solid wood door cost

Another cost of wear and tear. One of the rooms door is broken, actually long overdue but this time the tenant managed to tear down the door. When they left, and i came back to inspect they managed to place the door back and it easily fall off upon touch.

After asking around and checking online, finally head over to Seng Kong Door nearby @ Jalan Puchong Batu 6. They don't do service for plywood door which is only RM78+. Meaning no transport delivery available as well. Installation is by their partner contractors sifu @ RM60. But with no delivery service it doesn't help at all.

End up need to go for solid door, which they can provide transport and since the installer is available today , i took up the deal offered.

Cost:

Solid wood door -cheapest quality  @ RM200
Transport cost @ RM30
Lock @ RM25
3x Hinge @ RM15
+GST of ~ RM16

Summary:

Adding up above material & transport damage is RM286.

Installation cost RM65 (paid him extra RM5 as he is pretty professional)

'Work pass/toll' cost RM30  - explained below.

Total damage is RM381. 

Now here is the unexpected part. Condo units i know they usually require paperwork for major reno. Went down to check with guard since Seng Kong shop guy called and ask whether they are allowed to work today. First guy said its fine since I'm owner.

When the transporter arrived, 2nd Indian guard appeared and said no. First dude is nowhere in sight now. Need paperwork and refused to let the lorry in. He had to drop the door at guard house and bring the door up to my unit, luckily not too far. Next the predictable issues follows when the installer arrives. He was not allowed to enter and work, again same guard causing issues. I came down and told him that it's only one door, still reluctant to budge saying he is doing his work only etc..

After some moments arguing, i asked him how we can settle this outside of management and he demanded RM50. Pretty outrageous, i refused and told him its too much. He replied that he has 4 guards to split to. This goes on for a while. I'm not going to send the installer home without getting anything done today. Eventually he settled for RM30 and asked me to drop it behind the guard house.

Not much i can do at the spur of moment, as i dont' have time to fool around with this bugger. So had to pay the RM30 'toll' fees from the security that we paid their salary for via management fees. Now for the post scenario thoughts, i will need to take some time and try to figure out how to take action. This is plain daylight robbery!

We as owners of the condo units being blackmailed and harassed by the guards entrusted to safe keep the residential.. There will be a retribution chapter soon, of that i can be quite sure of to make it happen with proper planning.

Not meaning to be racist but the transporter and installer both also commented that this kind of extortion happens everywhere in their daily work life when it's Indian guards others are okay, Chinese, Malay, Pakistani, Nepal or Bangladeshi.. That's pretty low and pariah man.

Anyway, today i get to accomplish all my objectives in a day.

Saturday, June 3, 2017

Bye bye Streamyx, Hello Webe broadband

For TLDR scroll all the way to bottom.

About 2 months back, if my memory serves me right we got mail (yes actual real mail) from TM announcing discontinuation of all Streamyx broadband service from Nov17 this year.


Meaning that our cheapo Streamyx will be out of service soon late this year and either we go for Unifi at ~RM100 + more each month or find alternative broad band solution. For only light use, Unifi is a bit overkill as we spent >12 hours at work each day.

It so happens that one heavy rain day few days back, lighting​ struck and zapped out our modem...oh dear..so a quick decision needs to be made.


1. Sign up for webe broadband 10G bonus +20Gb limit currently online at RM 59 per month. Not bad but need to buy the Wifi Modem at ~RM20x++. No bonding contract , I like it and an advance payment that will be used to offset first month payment..can't really trust next day delivery as this is not US we are talking bout. (Updated: as of 1-June the 10Gb bonus offer is no longer available).


2. Terminate Streamyx and phone number by walk in to main TMpoints. (Kelana Jaya)

Long story: Terminate TM Streamyx + phone number. This one needs to walk in to main branch of TMpoints ,give their hotline a call at 100 be very patient in waiting to verify the branch that can process this. Have your TM Streamyx account in hand, they need to verify your IC once you fill in a simple form and submit. Pretty easy if you have no outstanding to pay. TM will take 14 days to process termination, charge you service of that period (ridiculous!) And mail back a check with your balance deposit paid during package sign up registration.

PS: I called 100 asking if I can terminate my line & Streamyx and the operator dumbly took my account number, check and after some ding dongs told me, sir you can't terminate via hotline. Oh dear, why you no say so when I first asked (my very first question?!?!)

3. Contact webe via online chat. Got delivery number and keep pestering for them to deliver within their 1-3 days promised time. Next day delivery my foot ha!

The courier line clear under packet one aka webe hotline is +603 5990 5990


Long story: Now webe doesn't have a hotline. They have this online support on web. Which gives you second thoughts on their support sincerity. Hi sir, how can I help you? :)...pls don't smiley face me if you don't mean it. First operator refused to give me a number to contact the delivery team , Line Clear. Was promised they will deliver the next day but didn't happen. Gave them another call luckily they do half day delivery on Saturdays. Please have Line clear tracking number ready, it's the 6 digit number that operators say starts with Webe word. Some operator can actually check by your application IC, so I guess that depends on their Intelligent check (sorry, fallout pun here haha)


4. Upon receiving setting up is really simple. Unbox, plug in sim and battery. Install Huawei Hilink app to update password and monitor usage if need to on your smartphone. Power on and use directly. This is probably the best part here. Fuss free from received to start using. For a small saving, subscribe to auto payment using credit card and get RM2 off each month.


TLDR, Streamyx modem get zapped by lighting. Ditched the plan for a webe broadband plan. Shared how to terminate streamyx and phone number, order and follow up webe broadband delivery. Now let's see how is webe broadband performance, so far it's pretty decent..hopefully not too congested in my area.

Tuesday, May 30, 2017

Withdrawal from kwsp/epf

First there are a few stages to withdraw. Here we only start withdrawal process after bank loan secured and paid 10% down payment for our secondary purchase.

1. Request a kwsp format loan statement at your bank by walk-in application. For Maybank we don't need to bring any specific doc except to verify with our ID. This one takes about 5-10 days processing time. Please make sure the statement has a bank seal (round chop).


2. Bring this document to kwsp branch, in my case I choose Kajang jln Reko branch. You can also print your latest statement and bring along. No need any form filling.


Link

At this point, I took number and went to counter. The bank statement check is the one that stumped me, as the lady in charge politely tells it needs a bank round seal stamping. There is no space or writing stating it's needed but it's what kwsp checked.

So I took a detour to nearest jalan tukang Maybank and luckily the person in charge helped out by stamping on behalf. Take another trip back, no need to take number this time, just approach the lady that served me just now and we are done after fingerprinting her receipt document and giving me a customer copy. I need to give Maybank a call on how to handle kwsp's dis bursement. Pretty strange huh...

Anyway, for first time epf withdrawal we just need kwsp format bank loan statement and current own kwsp statement. If you didn't print the statement, it's available at kwsp branch, just login to the kiosk machine and print a copy with help of a staff of course.

For second time withdrawal , we can apply it online via kwsp's i-akaun. So it's pretty convenient, but after this lump sum withdrawal my account 2 will be quite dry for a while..


Saturday, April 1, 2017

KL to Bangkok -business trip (solo survival journey)

It's been a while since i travelled solo for business. This time to Bangkok via Malaysia Airline.

 Murtabak Ayam..just soso. Maybe nasi lemak is better. Met a dude working for Google, pretty young guy, but didn't manage to get his contacts to keep in touch. Well anyway.


 Get a new SIM +data. For DTAC it's 299 for unlimited data, valid for 7 days. Cause of the long queue, probably the best I guess, and didn't disappoint.


 Machine is coin operated, or queue at counter. This one is outside baggage collection, there are a few smaller stalls. Other choices is True Move and AIS. I saw somewhere AIS gave like 4G unlimited data , valid for 7 days @ 299 baht too.


As soon as I get data, I can call for Grab..It's fixed 500 baht + 75 baht toll fee. This fee is not included in his receipt unfortunately. :( So I kind of got cheated 50baht off my claim, only get the 25 baht toll receipt.


Journey took almost 1hour +, pretty jammed and the taxi driver said a little (niynoi?)

Tuesday, January 31, 2017

Lazada: My first time use experience - microSD card

This is my first time using Lazada and it's pretty impressive what good deals you can find, if you try hard enough searching. After searching & comparing for a while, i got a grasp of average pricing for a class 10 microSD card 128Gb which is around RM90+/-. Good thing about lazada is they do free shipping.

Placed my order on this date: 9th-Jan-2017
Received on

Thumbs up for the efficiency.


I received additional items along with my order, which is a nice surprise. A USB LED light, well still its free even if it's not very useful and a SD card reader, now that is pretty nice.


Upon plug in , my Mate 8 detects a potentially slow card on a class 10? sd card. Hmm..maybe it's a pirated version and some message saying that this card maybe corrupted. Google a bit & after formatting the card , i have not seen these 2 message anymore.

Don't notice any sluggish response when i take photo, view gallery & play video. So it's all good enough for me. Let's see far/long this little guy-huge capacity can go.

Thumbs up to Lazada for giving me a pleasant purchase experience =)

Update: nothing comes too cheap. Let this be lesson to my silly self LOL...Can't be a RM35 price for 128GB...It's practically useless since it randomly corrupts files which beats the purpose of having an SD card. Well...I'll stick to market price and branded product from now i guess at least for this range of products and due to rband reliability. Should've gone with RM 90+/- Kingston or scandisk 🤔😓

Friday, January 13, 2017

Swap your own T8 flouroscent to LED T5 lamp


Since young time, i rarely see my family fix anything at home, leaking tap /pipe or broken lights all also hire people. 

Today everything very expensive, but we live in ICT era where information is easily accesible via Mr G(oogle) and there is MR DIY everywhere. For a flourescent light with old legacy style fixture (the holder), i called one contractor and he quoted RM60 together with purchase of lamp. That is ~RM4x for installation work along, that also considering that he is willing to do swapping of 2-3 sets of flourescent light, some might even refuse because not much to earn ma.

First of all, safety is most important. Electrocuted dude, is not a happy MR DIY.

Get a Voltage Detector, this one runs on AAA battery. Just turn on light switch & watch the LED & beeper goes wild. That is to detect the live wire since cabling standards can be quite messed up depending on what the contractor likes at the time of installation.

Have to use this thing for nerdy/noobie people that just start DIY, better be safe than shocked.


Even went to MR DIY to read some manual of rewiring T8 fixture to use T8 tubes on old fixtures.

Even google up what is ballast, fuse and fixtures during the process. 

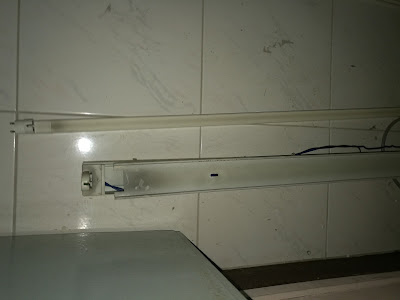
First attempt didn't go so well. Figured out how to unscrew fixture & dismantle it. This is some weird classic T8 fixture and in it slotted with a T5 fixture to accomodate T5 light using legacy T8 fixture.

Burnt my first cable. Very simple mistake, having wire tape the 3 cables together. After observing how my contractor works, i figured out that these cables need to be separated. When AC current runs, it can get qutie hot and short/burn the wires like below.

And using this triangle connector is silly. The expert told me, this thing has nothing to do with installing fluorescent light wiring. Now i see, why i screwed up thinking that this is the connector =.=''

Finally after some advice from experienced bro, and observation i tried again. My chance came quite fast. Right side live, left side neutral and middle earth. Finally succeeded. Proud of myself LOL

Hire cost: 

a) change light RM60 per set

DIY:
a) buy voltage detector ~RM15
b) buy new yellow T5 LED light RM12.50
c) spend time to try ~3 hours on site
Total DIY cost = RM22.50.


Next time i change if i do T8 LED tube, it's ~RM20 as cost per light. LED suppose saves electricity alot more & can last ~15 to 20 years. 


But need invest in drille since standard flourescent light wiring is in middle, LED light can connect on its side. 

In the mean time, invested the RM30+ for emulsion paint and RM20 x2 gloss paint for repainting metal gate & part of house wall. Scraping tool and plaster material + sandpaper costs less than RM10.
The rest is invest own time to make own house nice. Not so bad, at least it's my own haha.